Leave Your Message

How to Apply Adhesive Wallpaper for a Quick and Stylish Home Makeover

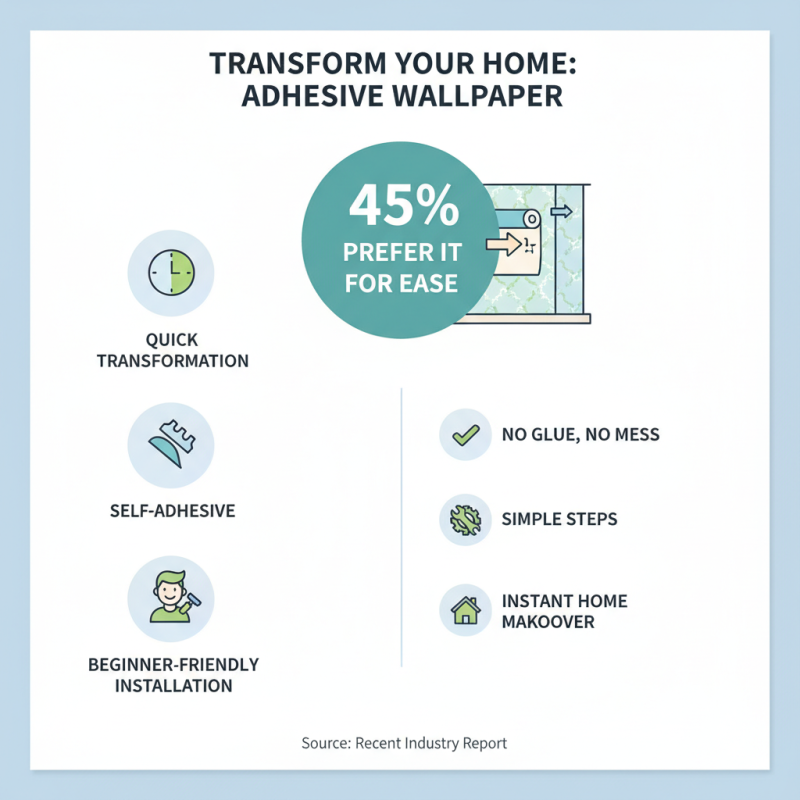
Transforming your living space can be a simple yet effective way to breathe new life into your home. One of the most popular methods for achieving this is through the use of adhesive wallpaper. This innovative product allows you to quickly change the look and feel of any room without the mess of traditional wallpaper.

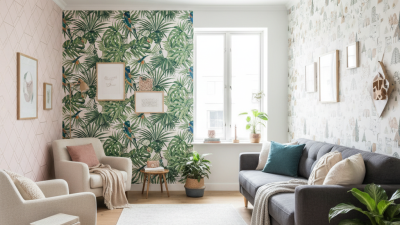
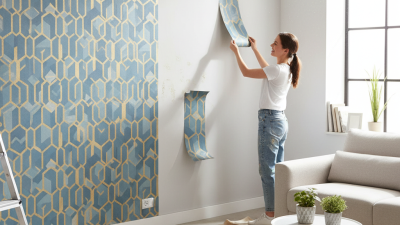
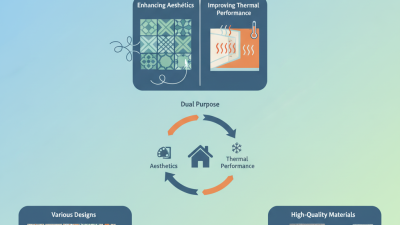
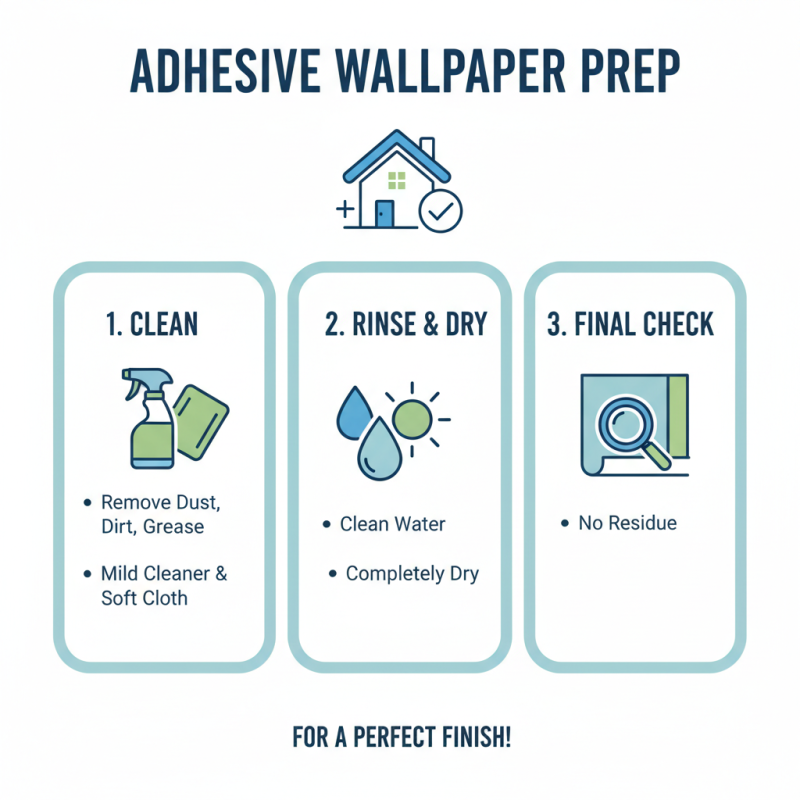
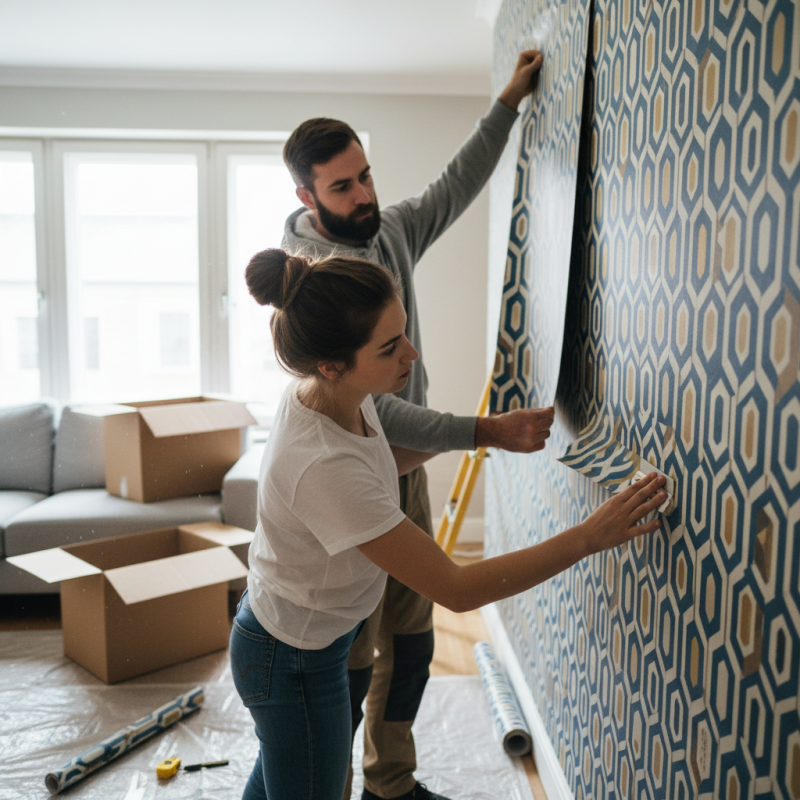
Imagine your walls adorned with beautiful patterns that reflect your personal style. Adhesive wallpaper is versatile and comes in countless designs, from bold geometrics to soft florals. It’s perfect for renters and homeowners alike. However, applying adhesive wallpaper can present challenges. You might encounter issues with bubbles or misalignment if not careful.

Take your time to measure and cut accurately. These small details can lead to a polished finish. Experiment with different designs and placements before committing fully. The freedom to remove and reposition is one of the greatest benefits. Let your creativity shine while staying mindful of the potential for imperfections. Embrace the process, and don’t be afraid to learn from your mistakes.

How to Apply Adhesive Wallpaper for a Quick and Stylish Home Makeover

Choosing the Right Adhesive Wallpaper: Types and Styles Explained

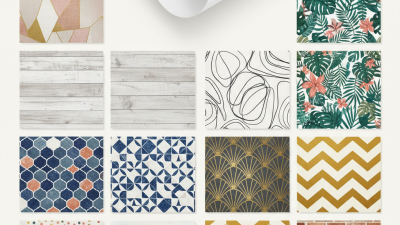
Choosing the right adhesive wallpaper can transform your space quickly. There are many types to consider. Traditional designs feature florals and stripes. These can create a classic feel. Geometric or abstract patterns add a modern touch. Bold colors can energize a room, while soft hues bring calm.

Take time to assess your space and style. Lighter wallpapers can make small rooms appear larger. Darker shades offer warmth but may feel cramped. Texture is also important. Smooth finishes are simple to clean, but textured options can add depth. Sometimes, it’s hard to decide what works best.

Wallpapers are not just about looks. They affect mood and atmosphere. It's easy to get carried away with trends. Keep your personal taste in mind. Choosing the wrong pattern may lead to regret later. Reviewing samples on your walls helps visualize the final look. Remember, it's okay to change your mind during the process.

Preparing the Surface for Adhesive Wallpaper: Best Practices and Tips

How to Apply Adhesive Wallpaper for a Quick and Stylish Home Makeover

Preparing the surface for adhesive wallpaper is crucial for a successful application. Start by cleaning the wall thoroughly. Dust, dirt, and grease can ruin the adhesive. Use a mild cleaner and a soft cloth. Rinse with clean water and let it dry completely. Sometimes, you might miss a spot. Check for any residue.

Next, inspect your walls for imperfections. Look for cracks, holes, or peeling paint. These issues need addressing. Fill small holes with spackling compound. For larger cracks, a more durable solution may work better. After repairs, sand the surface lightly. This helps smooth out wrinkles. A straight edge can help identify uneven areas.

Choose the right environment for application. Ideal temperature and humidity levels matter. Too much moisture can affect adhesion. If your room feels damp, wait for better conditions. Also, gather tools upfront—measuring tape, scissors, and a smoothing tool. These will save you time and hassle. A careful setup can lead to a more polished finish, but be ready for adjustments along the way. Mistakes can happen. Even the pros encounter challenges.

Measuring and Cutting Adhesive Wallpaper: Techniques for Precision

Measuring and cutting adhesive wallpaper requires precision. Start by measuring the wall's height and width. Use a level to ensure your measurements are accurate. Mistakes happen. Double-check before cutting. One wrong cut can lead to mismatched patterns.

When cutting the wallpaper, use sharp scissors or a utility knife. Lay the adhesive side down on a clean surface. Mark your dimensions lightly with a pencil. A ruler helps create straight lines. If your wallpaper has a repeating pattern, make sure to align it correctly. Take your time here; any misalignment can be noticeable.

**Tip**: Always cut an extra inch or two. This will give you room to adjust during installation.

Aligning the wallpaper on the wall is crucial. Start from a corner or a straight edge. Slowly peel back the adhesive, smoothing it with a squeegee. Air bubbles happen. If they do, use a pin to release the air.

**Tip**: Work in small sections for better control. It can be tempting to rush, but patience will yield a smoother finish.

Adhesive Wallpaper Application Techniques

Applying Adhesive Wallpaper: Step-by-Step Instructions for Beginners

How to Apply Adhesive Wallpaper for a Quick and Stylish Home Makeover

Applying adhesive wallpaper can transform your home quickly. According to a recent industry report, 45% of homeowners prefer it for its ease. This type of wallpaper is self-adhesive, making installation simple. Beginners may find the task daunting, but with a few steps, it becomes manageable.

Start by measuring your wall. This helps in estimating how much wallpaper you need. Ensure the wall is clean and dry before applying. Use a level or a straight edge. This prevents crooked lines, a common mistake. Many people overlook that wallpaper often has a pattern that needs aligning. This simple oversight can lead to wasted materials and a less polished look.

When applying, peel off a section of the backing. Press the wallpaper against the wall. Smooth out any bubbles using a smoothing tool. If bubbles form, don’t panic. Puncture them with a pin and push the air out gently. Some may struggle with keeping the wallpaper straight. Practice makes perfect, and small imperfections will remind you of your journey in decorating. Remember, it’s okay to take breaks and reassess your progress.

Maintaining and Removing Adhesive Wallpaper: Expert Advice and Methods

Adhesive wallpaper can transform your space remarkably. However, maintaining and removing it are often overlooked. Regular cleaning is essential. Use a soft cloth to wipe down the surface. This keeps the wallpaper looking fresh. Avoid abrasive cleaners that could damage the cool design.

When it's time to remove the wallpaper, the process can be tricky. You may notice that some areas pull the paint. Patience is key here. Start at a corner and peel slowly. Use a hairdryer to warm up the adhesive; this helps ease the removal. If you encounter stubborn areas, try a mixture of warm water and dish soap. It can help loosen the glue without damaging the wall.

**Tips:** Always test a small area before fully committing to wallpaper removal. This will help you understand what to expect. If you notice some tearing, don’t fret. You can patch those spots later with paint or touch-up solutions. Remember that each wall is different, and some might require a bit more effort than others.

How to Apply Adhesive Wallpaper for a Quick and Stylish Home Makeover

Step Description Tips
1 Choose Your Wallpaper Consider patterns and colors that match your decor.
2 Prepare the Surface Clean walls and patch any holes for a smooth finish.
3 Measure and Cut Wallpaper Use a level for straight lines, cutting excess material as needed.
4 Apply Adhesive Follow instructions for even application.
5 Position the Wallpaper Start at the top and smooth down to eliminate air bubbles.
6 Trim Excess Wallpaper Use a sharp knife for clean edges.
7 Finishing Touches Ensure all edges are securely attached.

Maintaining and Removing Adhesive Wallpaper: Expert Advice and Methods

Maintenance Tip Description Frequency
Dusting Use a soft cloth or feather duster to remove dust. Weekly
Spot Cleaning Use mild soap and water for stains. As needed
Check Edges Ensure all edges are adhered properly. Monthly
Removing Wallpaper Use a wallpaper remover solution for easy peel-off. When changing decor