Top Wall Tile Stickers Tips for Easy Home Makeover?
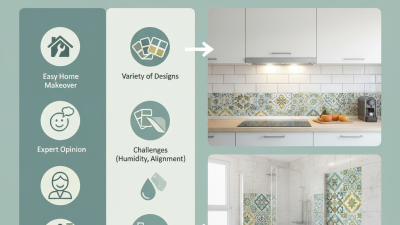
Transforming your home can be both exciting and daunting. Wall Tile Stickers offer a simple, stylish way to refresh your space without a massive renovation. They come in various designs and colors, making it easy to personalize your home. With just a few stickers, you can drastically change the ambiance of any room.
Using Wall Tile Stickers is not only an economical choice but also a time-saving one. Unlike traditional tiles, they don't require grout or special tools. You can apply them yourself, making it a fun DIY project. However, it's crucial to choose the right quality stickers. Cheap options might peel off or fade quickly, leading to disappointment.
Before you dive into the project, think about the areas that need a lift. Kitchen backsplashes and bathroom walls are popular choices. These spaces can greatly benefit from a quick makeover. Yet, not every sticker will stick well in high-moisture areas. Consider the materials and durability before making your decision. This attention to detail will ensure a long-lasting change you won’t regret.
Choosing the Right Wall Tile Stickers for Your Space
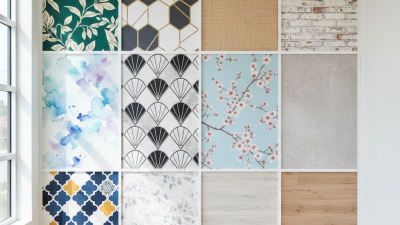
Choosing the right wall tile stickers for your space can transform your home. The options are endless and picking the best fit may feel overwhelming. Consider the size of your room. Large stickers may dominate small spaces, while tiny designs can get lost on expansive walls. Ensuring a visual balance is crucial.
Colors matter too. Bright colors can energize a dull room, while softer tones create a calm atmosphere. Evaluate the existing color palette of your space. Wall tile stickers should complement, not clash. Think about the mood you want to set. Experimenting with colors can lead to surprising outcomes.
Material choices impact durability and ease of application. Some stickers resist moisture well, making them ideal for kitchens and bathrooms. Others may not last long in high-humidity areas. Research the textures. A glossy finish might reflect light beautifully, but it could also show smudges quickly. Weigh these factors carefully before making a decision.
Top Wall Tile Stickers Tips for Easy Home Makeover
Choosing the Right Wall Tile Stickers for Your Space
Preparing Your Walls for Tile Sticker Application
Preparing your walls for tile sticker application is a crucial step in achieving a flawless finish. Evaluating the wall surface is essential. A smooth and clean surface allows for better adhesion. According to industry studies, nearly 70% of installation failures are linked to improper wall preparation. Cleaning the walls with a mild detergent ensures that oils and dirt do not interfere with adhesion.
Once the walls are clean, checking for imperfections is vital. Fill in any cracks or holes with a suitable filler. This can prevent the stickers from bubbling or peeling over time. A level surface enhances the overall appearance of your tile stickers. An even distribution of weight on the stickers leads to better longevity and durability.
Tips: Use a ruler or level to mark guidelines before application. This helps align the tiles properly. Additionally, let your stickers acclimate to room temperature before application. Cold or hot stickers may not adhere well. Taking these minor steps can lead to remarkable results. Ensure that your workspace is well-lit to spot any imperfections during the installation process. Even the smallest oversight can compromise the stunning effect you desire.
Step-by-Step Guide to Applying Wall Tile Stickers
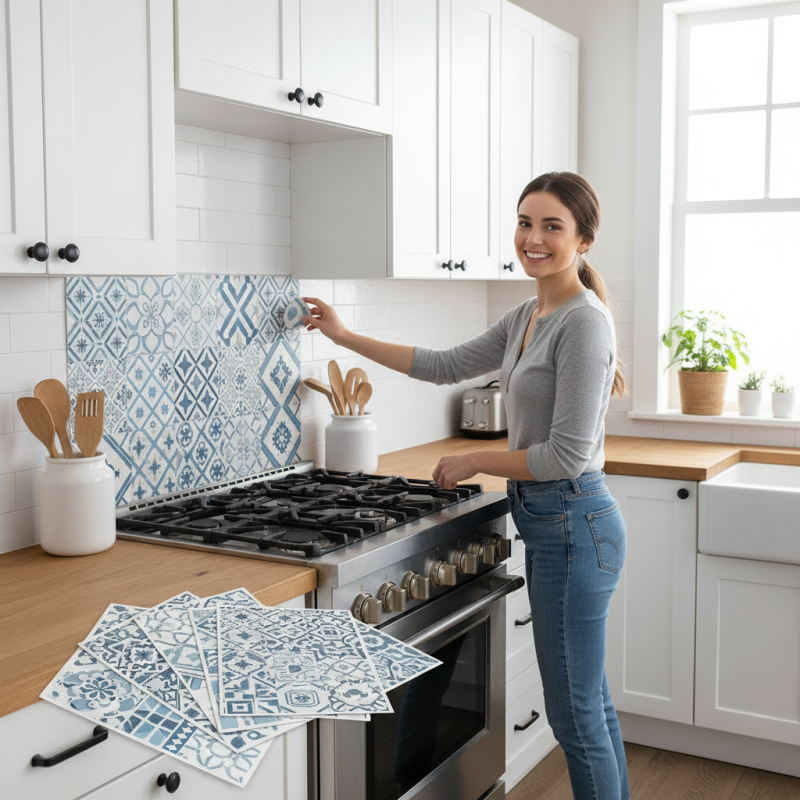
Applying wall tile stickers can transform your home quickly and affordably. A report by the Home Improvement Research Institute indicates that DIY home projects have surged by over 50% in the past five years. Many homeowners are looking for easy, cost-effective solutions. Wall tile stickers fit this trend perfectly. They come in various designs, adding character and style to any room.
Start by preparing your wall. Ensure it’s clean and dry for the best adherence. A smooth surface is crucial. Rough or uneven walls may cause the stickers to peel or bubble. Measure your space accurately. Planning helps avoid mismatched designs or inadequate coverage.
When applying, peel the sticker slowly to maintain its shape. Press from the center outward to eliminate air bubbles. Using a smoothing tool can ensure a flawless finish. The Home Renovation report states that 70% of homeowners face challenges when repositioning stickers. Thus, take your time and press down firmly. Review your work. Some tiles might misalign, requiring adjustments. Remember, minor imperfections can enhance the charm of your makeover.
Top Wall Tile Stickers Tips for Easy Home Makeover
| Tip |
Description |
Material |
Application Surface |
Estimated Cost |
| Clean the Surface |
Ensure the wall is clean, dry, and smooth for better adhesion. |
Vinyl |
Tiles, Drywall |
$10 - $20 |
| Measure Twice |
Accurate measurements help avoid mistakes in placement. |
Self-adhesive |
Kitchen, Bathroom |
$15 - $25 |
| Choose a Pattern |
Select a design that complements your home decor. |
Ceramic/Plastic |
All surfaces |
$20 - $40 |
| Use a Utility Knife |
Cut tiles for a perfect fit around edges and corners. |
Vinyl |
Corners, Edges |
$5 - $15 |
| Press Firmly |
Apply even pressure to activate adhesive and eliminate air bubbles. |
Self-adhesive |
Flat surfaces |
$10 - $20 |
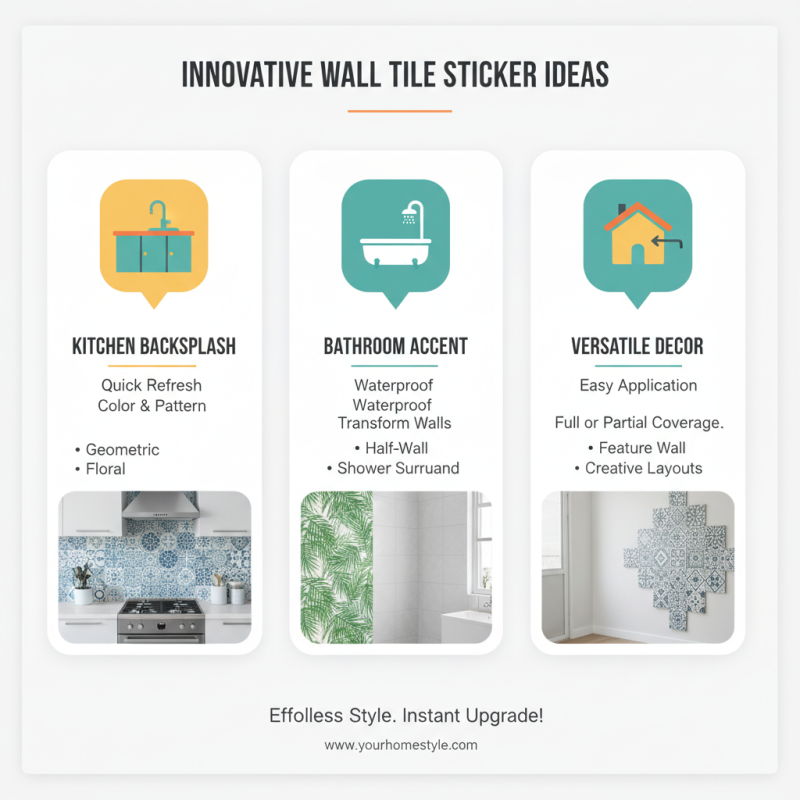
Innovative Design Ideas for Using Wall Tile Stickers
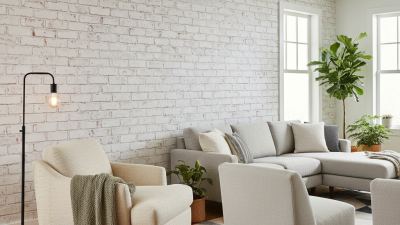
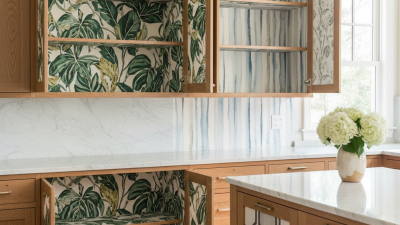
Wall tile stickers offer a creative way to refresh your home without the hassle of traditional renovations. Consider using them in kitchens or bathrooms. A splash of color can transform a dull space into a vibrant environment. Patterns like geometric shapes or floral designs can add character quickly. Wall tile stickers are versatile; they can cover an entire wall or just a section. This flexibility allows for experimentation in different areas.
For a more cohesive look, match sticker designs with existing decor. Take a moment to think about your color palette. Light hues can brighten small spaces, while darker shades add depth. Mixing textures can also create interesting contrasts. However, be cautious; overdoing patterns may overwhelm the eye. It’s essential to strike a balance between creativity and comfort.
Installation is straightforward, but surface preparation is crucial. A clean, smooth wall ensures better adhesion. Learning from challenges, like bubbles forming, can lead to better techniques. Sometimes the placement might not be as perfect as envisioned. Don’t fret—embracing imperfections can lead to unique outcomes. Emphasizing these design ideas can make your home feel genuinely yours.
Maintenance Tips for Long-Lasting Wall Tile Stickers
When it comes to maintaining wall tile stickers, several insights can enhance their longevity. According to a recent survey from the Home Improvement Research Institute, over 70% of homeowners mistakenly neglect simple maintenance practices. Regular cleaning is key. Use a gentle soap solution and a soft cloth. Harsh chemicals can damage the adhesive and degrade the sticker's appearance.
Another crucial aspect is environmental factors. Humidity and temperature fluctuations can affect the durability of wall tile stickers. Ideally, keep the home environment between 60°F and 80°F. This temperature range minimizes the risk of peeling edges or bubbling. A study published by the National Association of Home Builders emphasizes that controlling humidity can extend the life of wall coverings by as much as 30%.
Lastly, be mindful of surface preparation. Wall surfaces should be clean and smooth before application. Dust or grease can lead to premature peeling. While some products claim easy application, the reality is different. Homeowners often report needing additional preparation time. A well-prepped surface ensures better adhesion and a more refined look. Taking these measures can significantly enhance the visual appeal and longevity of wall tile stickers.